
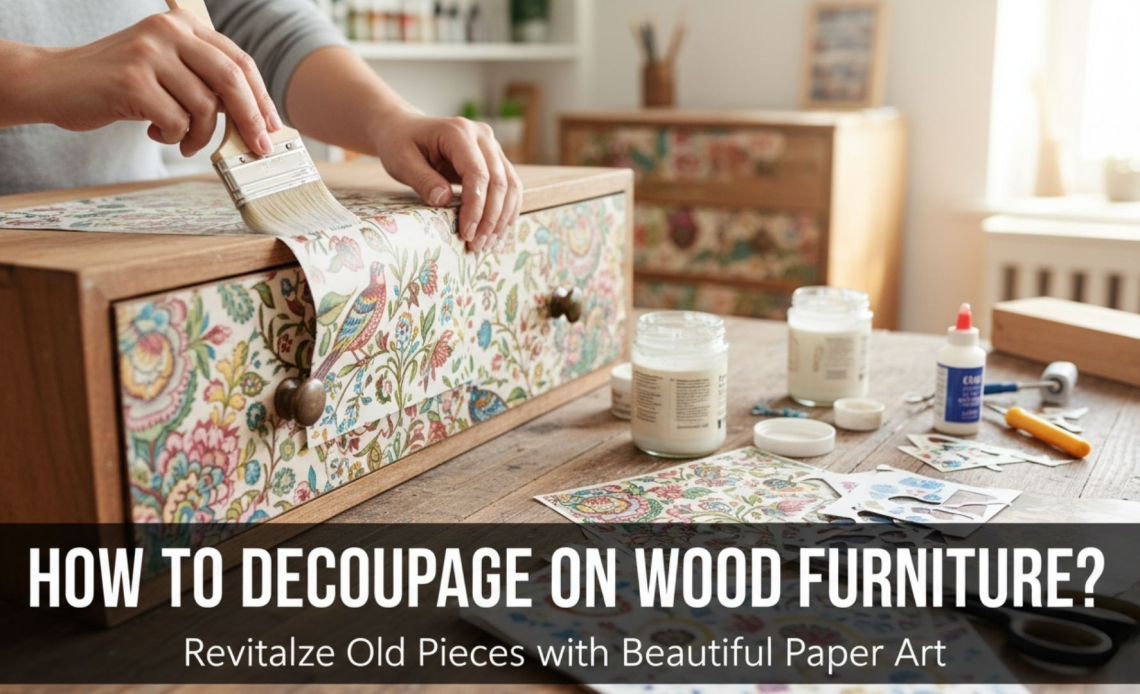
Decoupage is one of those creative techniques that can completely change the character of a tired wooden chair, side table or dresser with nothing more than paper, glue and a little patience.
Whether you want a romantic floral nightstand, a playful kids stool or a bold art piece, decoupage on wood furniture is budget friendly, forgiving and beginner friendly.
This guide walks you through everything from choosing the right furniture and materials to preparing the surface, applying paper without bubbles and sealing it so your design lasts.
What Is Decoupage And Why It Works On Wood?
Decoupage is the art of decorating objects by gluing paper cutouts onto a surface and sealing them with layers of a clear finish.
The layers of sealer dry to a smooth, almost painted look, so the paper becomes part of the furniture rather than sitting on top.
Wood is an ideal base for decoupage because:
- It is sturdy and can handle sanding and multiple layers of sealant.
- The grain gives a subtle texture that looks beautiful under translucent papers.
- You can repair, repaint or rework it if you make mistakes.
You can decoupage with many paper types. Napkins give a soft, almost painted look. Scrapbook paper and wrapping paper offer strong colors and patterns. Vintage book pages and maps create a layered, collected feel.
Choosing The Right Furniture And Materials
Best furniture pieces for decoupage
Almost any wooden piece can be decoupaged, as long as it is solid and clean. Good starter projects include:
- Flat drawer fronts and cabinet doors
- Table tops, side tables and nightstands
- Wooden stools, benches or simple chairs
- Wooden trays or boxes, if you want to practice on something small
Avoid heavily curved or ornate surfaces for your first project. Flat or gently curved areas make paper placement and bubble removal much easier.
Read More: 10 Brilliant Ideas for a Budget-Friendly Home Makeover You’ll Love
Materials you will need
Have your supplies ready before you start so you can work smoothly:
- Wood furniture piece, clean and dry
- Fine and medium grit sandpaper or sanding sponge
- Damp cloth or tack cloth for dust
- Decoupage medium or white PVA glue thinned slightly with water
- Soft synthetic brush or foam brush for glue and sealer
- Chosen paper (napkins, tissue, scrapbook paper, book pages, maps)
- Small scissors or craft knife
- Plastic card, brayer or rubber scraper for smoothing
- Clear topcoat such as water based polyurethane or a compatible varnish
- Optional primer or paint if you want a colored background
Prep The Wood Surface
Good preparation is the secret to a smooth, professional looking finish. Decoupage does not hide rough, dirty or peeling surfaces. It will highlight them.
Clean and inspect
First, clean the furniture thoroughly. Remove dust, grease and old polish with a mild cleaner and let it dry.
Check for loose joints, flaking finish or deep scratches. Repair or tighten anything that feels unstable before you decorate.
Sand for a smooth base
Lightly sand the area you plan to decoupage. The goal is to knock back gloss and create a smooth, slightly keyed surface, not to strip it down completely unless the old finish is in very bad shape.
Wipe away all dust with a damp cloth or tack cloth. Any dust left on the surface can create bumps under your paper.
Prime or paint if needed
If the existing wood color is very dark and your paper is light or translucent, consider adding a coat or two of primer or paint in a light shade.
This keeps colors true and prevents the wood tone from showing through. Allow the paint to cure fully according to the label before you move on.
Prepare Your Paper
How you cut or tear your paper affects the final look.
For a crisp, graphic style, cut clean shapes with scissors or a craft knife. For a softer, blended edge that disappears more easily, tear the paper by hand.
Many decoupage artists like to tear around motifs so the edges feather into the background rather than forming a hard line.
If you are using napkins, peel away the plain backing layers until you are left with a single printed layer. Thinner paper merges into the surface more easily but also tears more easily, so handle it gently.
Lay out your pieces on the furniture dry first. This dry run lets you adjust spacing and balance without committing to glue.
Read More: How To Make DIY Chalk Paint?
How to Apply the Paper to Wood?
Coat the surface with glue
Working in sections, brush a thin, even layer of decoupage medium or thinned PVA glue onto the prepared wood. Do not flood the surface. Too much glue makes paper swell and wrinkle more.
If you are covering a large area, divide it mentally into smaller zones and work on one at a time so the glue does not start to dry before the paper is in place.
Place the paper
Gently place the paper onto the glued area. Start at one edge and lower it slowly, rather than dropping it flat. This helps push air out as you go.
You have a short window to nudge or slide the paper into position. Do this carefully and avoid stretching it.
Smooth out bubbles and wrinkles
Use your fingertips first to lightly press the paper from the center outward. Then, use a plastic card, small brayer or rubber scraper to smooth more firmly.
Work from the center of the motif toward the edges to push out trapped air and excess glue.
Be patient with thin paper. Too much pressure can tear it. If a small wrinkle remains and will not smooth out, accept it. A few minor imperfections often vanish visually once everything is sealed.
Seal the paper
Once the paper is in place and smoothed, allow it to sit for a few minutes, then apply a light top coat of decoupage medium over the paper and surrounding area. Use long, even strokes in one direction.
The paper may wrinkle slightly as it absorbs moisture, which can be alarming. Often, as the glue dries, it tightens again. Leave it alone while it dries. Resist the urge to keep touching it.
Let the first coat dry completely according to the product directions before adding another. Two to three thin coats usually create a good protective base for furniture.
Build Up A Durable Finish
For decorative items that will not see much wear, multiple coats of decoupage medium may be enough. For table tops, chair seats or anything that will be handled often, add a tougher clear topcoat.
Once your glue coats are fully dry:
- Lightly sand with very fine sandpaper to knock down any raised fibers or brush marks.
- Wipe away dust.
- Apply a clear water based polyurethane or compatible varnish in thin, even coats.
- Allow each coat to dry before adding the next.
Several thin coats are better than one heavy coat. They dry harder and clearer and are less likely to trap brush strokes.
Always test your chosen topcoat on a spare decorated scrap of wood or an inconspicuous corner first. Some solvent products can react with certain inks and cause smearing.
Design Ideas And Styling Tips
Decoupage is as subtle or bold as you want it to be.
- For a vintage look, use old book pages or sheet music over an off white background and add floral motifs on top.
- For a modern twist, decoupage graphic black and white patterns on drawer fronts and pair them with sleek hardware.
- For children, use bright illustrated papers on stools, toy boxes or bedside tables and seal very well for durability.
- For a layered effect, combine different but related patterns in one color family across a set of drawers.
Limit your palette to two or three main colors on one piece. This keeps the result cohesive rather than chaotic.
Common Mistakes To Avoid
A few simple habits prevent most decoupage problems.
Do not rush drying times. Trying to sand or add more coats before the layer beneath is dry can cause cloudiness or peeling.
Avoid thick glue layers. Excess glue causes bubbling and makes drying slower and less predictable.
Do not skip surface prep. Dirt, grease and high gloss finishes prevent good bonding and can lead to lifting edges later.
If you need to remove a paper section that went wrong, do it while the glue is still wet, wipe the area clean, let it dry and try again.
Read More: Best 13 Interior Paints for Walls
Care And Maintenance Of Decoupaged Furniture
Once fully cured, decoupaged wood furniture is surprisingly sturdy.
Treat it as you would any painted or varnished piece. Dust regularly with a soft cloth. For sticky spots, use a slightly damp cloth, then dry immediately. Avoid harsh cleaners or abrasive pads, which can scratch the finish.
Use coasters and placemats on decoupaged table tops, especially in the first weeks while the finish is still hardening.
If you ever notice dullness or fine scratches over time, a light cleaning followed by a fresh coat of clear topcoat can refresh the surface.
Conclusion
Decoupage on wood furniture is a satisfying way to bring personality into your home without buying new pieces.
With careful prep, thoughtful paper choices and patient layering, you can turn a plain side table into a custom statement or rescue a worn dresser that still has good bones.
Start with a small project, permit yourself to experiment and you will quickly gain the confidence to tackle larger, more ambitious furniture makeovers.