
Building your own home is one of those projects that sits at the intersection of dream and logistics. You are not just choosing paint colors.
You are making decisions about land, structure, safety, and hundreds of small details that add up to a house that should serve you for decades.
Handled with a clear plan, the process is manageable, even if you are not in the construction industry.
This guide walks you through each major step, from early budgets to move in day, so you know what to expect and when.
Decide if building is really right for you
Before you price lots or sketch floor plans, step back and look at the big picture.
Building a home typically takes many months from design through final inspection, often in the range of about eight to fourteen months for a custom single family house once work starts on site, and longer if permitting or design drags.
Ask yourself:
- Are you comfortable managing a long project with periodic decisions and a steady stream of invoices?
- Do you have flexibility in your move date if there are delays?
- Are you building to get something truly specific, or could an existing home with renovations meet your needs?
Being honest at this point can save you from getting halfway into the process and realizing you preferred a simpler path.
Set a realistic budget and line up financing
Everything that follows is controlled by your budget. The structure you choose, the finishes you pick, and even which builders are interested in your project come back to what you can afford.
Recent estimates place typical construction costs for a new single family home at roughly 150 to 250 dollars per square foot for a standard build, with simpler or smaller homes sometimes closer to 100 dollars per square foot and high end custom homes easily reaching or exceeding 300 dollars per square foot.
These figures cover construction itself, not land, permits, design fees, utility connections, landscaping, or furnishings.
To build a workable budget:
- Start with land cost or an estimate for the area where you hope to buy.
- Add construction cost based on an approximate square footage range, not your ideal maximum.
- Include soft costs such as architectural design, engineering, permits, surveys, temporary utilities, inspections, financing fees, insurance, and contingency. Many owners set aside at least 10 to 15 percent of the construction budget for overruns.
Most people use a construction loan that converts to a standard mortgage when the home is complete.
These loans fund work in stages, with the lender inspecting progress before releasing each draw. Expect the bank to review your plans, builder contract, and full budget before approval.
Read More: Buying Property For The First Time: Complete Beginner Guide
Choose your lot and understand what it allows
The land you pick will shape everything that follows. Two lots with the same price can have very different real costs once you account for grading, soil conditions, and utility access.
When you evaluate a lot, look beyond the view:
- Zoning and local rules: How large can the house be, and how far must it sit from property lines? Are there height limits or special design rules?
- Utilities: Are water, sewer, electricity, gas, and internet already at the street, or will you need wells, septic, or long utility runs?
- Topography and soil: Sloped or rocky sites can require retaining walls, special foundations, and more complex drainage.
If possible, involve a builder or civil engineer before you finalize the purchase. A quick site walk can reveal issues that are invisible in a real estate listing.
Decide who will run the build
You have two broad options: hire a licensed general contractor to manage the entire build, or act as your own contractor and hire trades directly.
Working with a general contractor
Most first time owners hire a general contractor who coordinates subcontractors, schedules inspections, manages site safety, and handles day to day decisions.
That contractor typically marks up trade bids and materials and charges a fee for management, either as a fixed price or a cost plus percentage.
The benefits are straightforward: a single point of contact, an experienced professional guiding the process, and someone who already understands local inspectors and suppliers.
Acting as an owner builder
In many parts of the country, property owners can legally act as their own general contractor under certain conditions, often called an owner builder arrangement.
You may be allowed to pull permits in your own name and hire licensed subcontractors directly, as long as you are building for yourself rather than for immediate sale and you follow all local rules.
The upside is potential savings and more direct control. The trade off is that you are responsible for scheduling, coordinating trades, solving field problems, and making sure work passes inspection.
If you do not already have strong construction knowledge, this can quickly become stressful and costly.
Design the house and lock in the scope
Once you have land, a budget, and a decision about who will run the build, you can move into design.
Depending on your goals, you might:
- Work with an architect or residential designer on a fully custom plan tailored to your lot.
- Start from a stock plan and have it adapted.
- Use plans provided by a design build firm that will both design and construct the home.
This phase should address not just room sizes and style, but also structural system, energy performance, and material choices. The more decisions you make on paper, the fewer surprises you face in the field.
When plans are far enough along, your builder or several competing builders can price the project. This is the moment to reconcile wish list and budget before contracts are signed.
Permits, insurance, and pre-construction tasks
Before any dirt is moved, the local building department must review your plans and issue permits.
The exact process varies by jurisdiction, but usually includes structural drawings, site plans, energy compliance documents, and sometimes engineering reports or soil tests.
At the same time, you or your builder should arrange:
- Builders risk insurance, which protects the structure and materials during construction.
- General liability coverage for accidents on site.
- Any required bonds for work in the public right of way, such as driveway aprons or utility taps.
Once permits are issued, the lender typically approves the first construction draw, and the project moves from paper to reality.
Site preparation and foundation
Construction on site usually begins with staking the house location, installing temporary utilities, and setting up erosion control.
Then crews clear vegetation, strip topsoil, and grade the site to create stable working conditions and manage drainage.
Foundation work follows, whether that is a slab on grade, crawl space, or full basement. Key steps here include excavation, footing and foundation forms, placement of reinforcing steel, and concrete pours.
Waterproofing, foundation drains, and anchor bolts prepare the structure to accept framing and keep moisture out.
This stage ends after inspections confirm that the foundation matches the approved plans and meets code requirements.
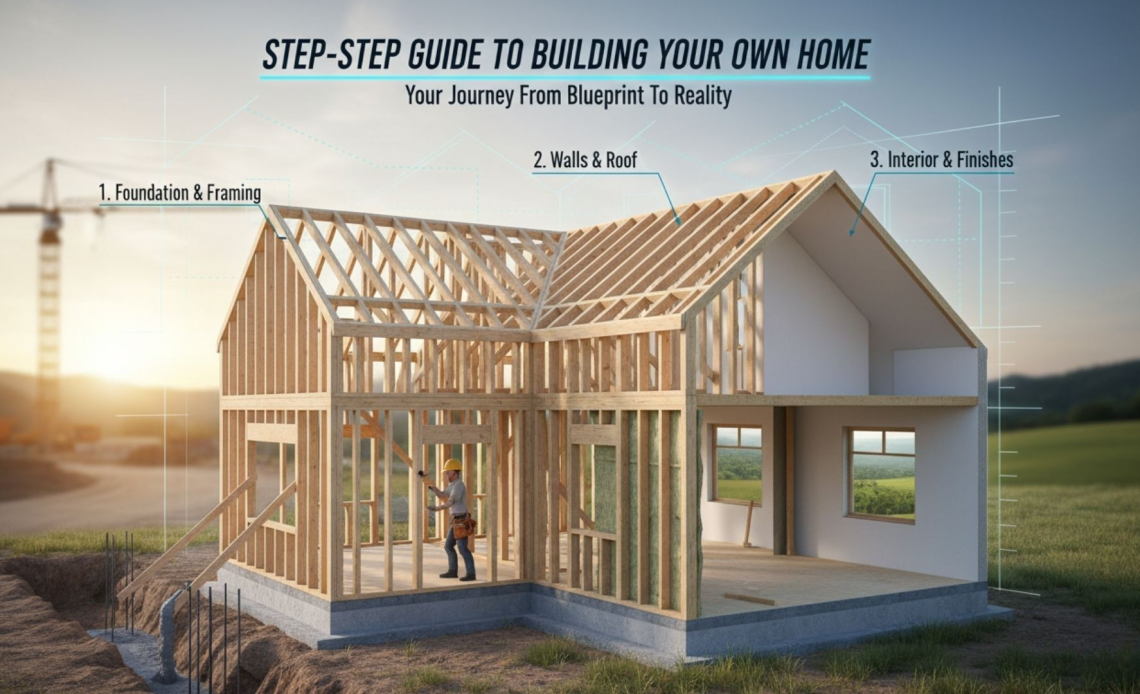
Framing and rough mechanical systems
With a foundation in place, the house begins to look real. Carpenters frame floors, walls, and roof, install roof sheathing, and set windows and exterior doors.
At this point you can walk through and sense room sizes and views.
As soon as the shell is weather tight, the major mechanical systems move in:
- Plumbing rough in for supply and drain lines
- Electrical wiring for outlets, lights, and panels
- Heating and cooling ductwork, equipment lines, and vents
Inspectors visit again to confirm that rough systems meet code before any insulation or drywall covers them.
Read More: Low-Budget House Construction Ideas That Actually Work
Insulation, drywall, and exterior finishes
After rough inspections, crews insulate walls and ceilings according to energy code and your chosen performance level.
Common options include fiberglass batts, blown in cellulose, or spray foam, sometimes in combination.
Next comes drywall. Sheets go up, seams are taped and finished, and surfaces are sanded smooth. Inside, the space finally feels like rooms rather than a skeleton.
Outside, siding, trim, roofing, and exterior paint or stain are completed. The goal is a fully weathered shell so interior finishes can proceed without exposure to the elements.
Interior finishes, cabinets, and fixtures
This is where the house starts to look like your home rather than a construction site.
Crews install:
- Interior doors and trim
- Cabinets and countertops
- Flooring
- Bathroom fixtures and tile
- Final lighting and electrical devices
At the same time, painters work through primer and finish coats, and the heating and cooling system is commissioned. Appliances are set near the end of this phase to reduce the risk of damage.
Final inspections, punch list, and move in
Near completion, the builder schedules final code inspections. Inspectors check that life safety items such as smoke alarms, stair handrails, tempered glass, and guardrails meet requirements, and that plumbing, electrical, and mechanical systems operate correctly.
If everything passes, the jurisdiction issues a certificate of occupancy that formally allows you to live in the home.
Before you accept the house, walk it carefully with the builder and create a punch list of items that need touch up or correction, such as paint flaws, sticky doors, or missing hardware.
Once these items are resolved and the lender converts your construction loan to permanent financing, you can move in and begin the part everyone actually imagines at the start: living in the home you planned.
Read More: Sale Deed Vs Agreement To Sell: Key Differences
Conclusion
Building your own home is not a weekend project. It is a structured process with clear phases, each depending on the one before it.
When you understand how land, budget, design, permitting, and construction fit together, you are better prepared to make decisions that protect both your money and your future comfort.
With realistic expectations, the right professionals, and a clear step by step plan, the experience does not have to be chaotic.
It can be what it should be: a demanding but rewarding path to a home that fits your life in a way few existing houses ever will.