
A trundle bed is one of those projects that quietly transforms a room. You gain a spare bed for guests or sleepovers, but when no one is using it, it disappears out of sight under your existing bed.
With a few basic tools, you can build a sturdy trundle in a weekend and tailor it to your mattress, your décor, and your space.
What exactly is a trundle bed?
A trundle is a low rolling platform that holds a mattress and parks under a regular bed. Most trundles are built to suit standard single or twin mattresses.
The trundle mattress is slightly shorter than the main bed so it can slide in and out easily. For example, trundles for a typical twin often measure about 38 inches wide and around 72 to 74 inches long so they clear the bed legs.
The mattress itself is usually thinner than a standard mattress so the whole unit fits under the main bed without rubbing.
Many guides recommend a trundle mattress about 6 inches thick to keep rolling smooth while still being comfortable to sleep on.
If you are comfortable with basic DIY skills like measuring, drilling and driving screws, building your own trundle can be more affordable than buying one and lets you match existing furniture perfectly.
Plan around your existing bed
The most important part of this project happens before you cut a single board. Start by measuring the space under your main bed. You need three key dimensions.
- Clear width between legs or side rails. This is the maximum outside width your trundle frame can be.
- Clear length between the headboard and footboard or any cross supports. Aim to keep the trundle slightly shorter than this measurement so it glides easily rather than scraping.
- Clear height from the floor to the underside of the bed rails or slats. This controls the total height of your trundle frame, base, mattress and casters.
Once you know the under-bed clearance, work backward. Add up:
- Frame board height
- Mattress base thickness (plywood or slats)
- Mattress thickness
- Caster height
That total must be a little less than the available height under the bed. Leave at least 1 to 2 centimeters (or about half an inch) of breathing room so the trundle does not snag on rugs, bedding or minor floor irregularities.
Confirm your mattress size. For a twin, a common size is about 38 by 75 inches, but because trundles often need to clear legs and supports, many designs trim the length by a few inches.
Gather tools and materials
You do not need a full workshop to build a trundle. A typical DIY build uses:
- Straight construction lumber for the frame, often 1×8 boards or similar, which gives you enough height for the structure without eating too much clearance.
- 1×3 strips or offcuts for internal supports or cleats.
- A piece of sturdy plywood for the mattress deck, frequently around 18 millimeters or three-quarter inch thick, or individual slats cut from boards.
- Four to six low profile casters, usually around 50 to 65 millimeters in diameter. Several DIY plans use about 2½ inch casters as a good balance between easy rolling and low height.
- Wood screws and pocket hole screws, plus wood glue for strong joints.
- Sandpaper, wood filler, primer and paint or stain.
A circular saw or miter saw, drill or driver, pocket hole jig (optional) and a tape measure will handle most of the build.
Read More: How to Build a New House: Step-by-Step Guide to Planning, Construction, and Finishing Touches
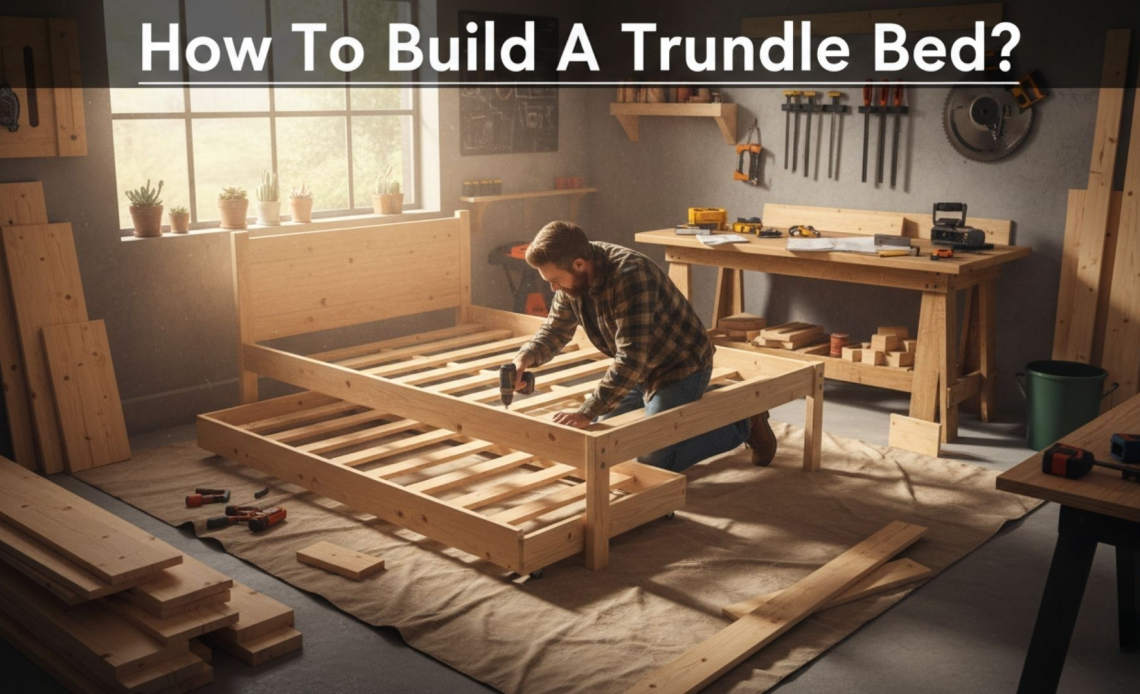
Build the outer frame
Start with a simple box. The inside dimensions of this frame should comfortably fit your mattress with a little room on each side for bedding and easy movement. A gap of 6 to 12 millimeters on each edge is usually enough.
- Cut two long boards for the sides to match your planned trundle length.
- Cut two shorter boards for the front and back to match the planned width.
Dry fit the four pieces on a flat surface to confirm the rectangle size, then assemble:
- If you own a pocket hole jig, drill pocket holes at the ends of the front and back boards. Apply wood glue at each joint and screw them into the side boards to create a rigid rectangle.
- If you do not use pocket holes, butt the corners together, pre-drill through the long sides and drive wood screws into the end grain of the shorter boards. Use clamps and a square so the corners stay at 90 degrees while the glue dries.
Check that the frame is still square by measuring diagonally from corner to corner. Both diagonals should match. Adjust while the glue is still wet if needed.
Add internal supports and mattress base
Your mattress needs a solid, well supported base. A common approach is to screw 1×3 cleats inside the frame, flush with or slightly above the bottom edge.
These narrow boards act as ledges to support either slats or a large plywood panel.
- Measure up from the bottom edge of the frame and mark a consistent line around the inside. This line is where the top of the cleats will sit.
- Cut cleats for both long sides and, if desired, shorter pieces for the ends. Glue and screw them in place.
If you plan to use slats, install a few cross supports between the long sides. These can be short lengths of 1×3 or 1×4 fixed between the cleats to stop them from bowing and to support the slats in the center.
Next, choose a mattress base:
- Plywood deck: Cut a single sheet of plywood to fit snugly inside the frame, resting on the cleats. This method is quick and adds racking strength. Many DIY trundle builds rely on one good sheet of plywood this way.
- Slatted base: Cut multiple slats to span from side to side and screw them down to the cleats and any center supports. Leave small gaps between slats for ventilation.
Whichever you choose, check that everything feels solid when you press down with your body weight.
Install the casters
Casters are what make a trundle convenient instead of a heavy wooden sled.
Flip the frame so the bottom faces up. Lay out your casters:
- One at each corner, set in from the edges so the wheels will not catch on baseboards or bed legs.
- One or two extra casters near the center on longer trundles to prevent sagging and to share the load.
Pre-drill holes for the caster screws so you do not split the wood, then screw each caster firmly into place.
If the trundle will carry adults or be used heavily, choose casters with a generous weight rating and metal mounting plates rather than light plastic wheels.
If your bed sits on hard flooring, you may prefer two locking casters on the front edge so the trundle does not drift when someone gets in.
Once the casters are on, stand the trundle upright again and roll it across the floor to make sure everything spins smoothly and tracks straight.
Read More: Top 11 Paint Sprayers For DIY Projects
Test the fit under your bed
This is the moment of truth. Remove any dust or offcuts from the floor under your bed, then gently roll the empty frame underneath.
- Points where the top edge of the trundle brushes the underside of the bed frame.
- Casters that clip baseboards, bed legs or center supports.
- Areas where a rug or carpet transition creates a small bump.
If the fit is tight, you have a few options before you panic:
- Shave a small amount off the top of the frame with a planer or by trimming the plywood slightly.
- Swap to slightly smaller casters, provided the bed can still roll cleanly.
- Move casters inward if they are striking obstacles at the edges.
- Raise the main bed a touch with low furniture risers if you only need a bit more clearance.
Once you are happy with how the empty frame moves, set the mattress in, make the bed and test it again. It should slide in and out with firm but easy effort.
Sand, finish and add details
With the structure right, you can make it look good.
Sand the entire frame, starting with a medium grit to remove rough spots and moving to a finer grit for a smooth finish. Fill any visible screw holes or seams with wood filler, let it dry, and sand again.
You can:
- Paint the trundle to match the main bed, using a stain-blocking primer under light paints.
- Stain and seal the wood for a natural look that fits rustic or Scandinavian-style rooms.
- Add a simple front panel that hides the frame and gives the illusion of a drawer. Cut a board the full width of the trundle and screw it to the front. A cutout handle, leather pull or recessed finger grooves make it easy to grab.
For kids rooms, a painted front with a name or motif turns the trundle into a feature instead of a hidden piece.
Safety and comfort checks
Before you call the project finished, run through a quick checklist:
- Weight support: Ensure the cleats, slats or plywood deck feel solid under load. If there is any flex, add extra supports.
- Mattress choice: Stick with the thickness you planned for. A mattress that is too tall can suddenly make the trundle jam under the bed. Many trundle setups are designed with a 6 inch mattress in mind for that reason.
- Finger safety: Make sure there are no sharp edges or protruding screws where hands will reach to pull the trundle out.
- Floor protection: If you have timber, vinyl or laminate floors, consider felt pads on the caster plates or choose casters designed for hard floors to prevent marks.
Once everything checks out, dress the bed with fitted sheets, a light duvet or blanket and a couple of pillows. Keep bedding slightly slimmer than on a main bed so the extra layers do not add unwanted height.
Read More: DIY Flooring Ideas and Advice: Creative, Affordable, and Easy Solutions for Every Home
Conclusion
Building a trundle bed is essentially a carpentry project in disguise as space planning. When you get the measurements and layout right, the woodworking itself is straightforward.
A strong rectangular frame, a well supported base and a set of quality casters. In return, you gain a flexible extra bed that slides away when you do not need it, perfect for a kids room, guest space or studio apartment.
Take your time at the planning and test fitting stages, do not rush the finishing, and you will end up with a custom piece that feels like it has always belonged under your bed.