
An open kitchen invites conversation, connects cooking with living, and turns mealtime into a relaxed ritual. The breakfast counter is the small bridge that makes this connection effortless. It serves as prep space, a casual dining spot, a coffee perch, a homework station, and sometimes a place to park groceries when you walk in. Designing an open kitchen with a breakfast counter is not only about looks. It is about proportion, circulation, storage, lighting, and acoustics that let the room work from morning to evening without clutter or crowding. With the right moves, even compact homes can enjoy a counter that feels generous and brings people together.
Why an open kitchen thrives with a breakfast counter
The breakfast counter solves several daily problems at once. It adds worktop area exactly where you need it and creates a social edge so the cook is not isolated. It shortens travel between the kitchen and living area and reduces the need for a full dining table on busy weekdays. When placed well, the counter becomes a natural buffer that keeps splashes and chopping action away from a sofa while still allowing eye contact and conversation. The counter also offers storage beneath, keeping small appliances, snacks, and tableware within arm’s reach. This combination of function and connection is why so many open kitchens feel incomplete without it.
Choosing the right counter type for your layout
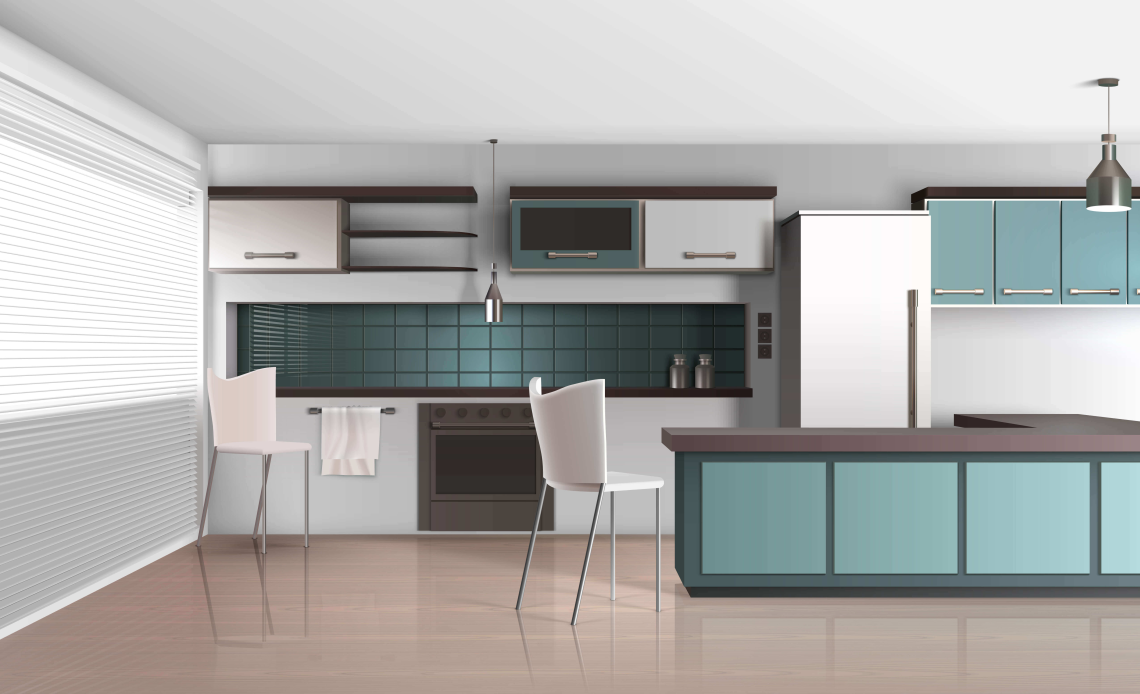
There are four common counter types that fit most plans. The peninsula extends from an existing run of cabinets and defines a gentle boundary between kitchen and living. It is perfect for compact spaces because it uses one side for movement and the other for seating. The island stands free with circulation all around. It suits larger rooms and allows seating to face any direction. The extended bar adds a raised or cantilevered ledge to an existing counter, separating prep from eating while keeping footprints tight. The wall attached counter occupies a niche or a window wall and becomes a slim breakfast ledge, ideal when space is scarce. Your choice depends on room width, door and window positions, and how you want people to move while someone cooks.
Getting dimensions right so the counter feels effortless
Comfort begins with precise sizing. A standard counter height of about 36 inches works well for mixed use and pairs with counter stools. If you prefer classic bar height, 42 inches creates a taller perch with a lighter visual feel, but it is less ergonomic for chopping. Allow around 24 inches of width per stool so people do not bump elbows. Plan knee space between 12 and 15 inches for counter height seating and a little less for bar height if the top is thicker. For movement, keep at least 39 inches of clear walkway behind stools to pass even when someone is seated. If the kitchen is a busy path, consider 47 inches so two people can pass with ease. These numbers shape daily comfort far more than the choice of finish.
Orienting the counter for views and conversation
A good counter faces the action. If your living room has a view, seat people toward it rather than toward a blank wall. If the television is important during breakfast or late night snacks, align the seating so heads do not twist uncomfortably. When the counter sits between kitchen and dining, let seating face the kitchen for quick serving on weekdays and swing around to the dining table for gatherings. Orientation also influences light. Place the counter where it catches soft daylight without glare, and avoid placing it in the direct path of a swinging door. Small orientation changes make the counter feel natural rather than forced.
Storage strategy under the counter
The space under the counter is prime real estate. Use deep drawers on the working side for bowls, plates, and cutlery so setting the counter takes seconds. A narrow drawer near the end can hold napkins and straws for quick access. If the counter forms a peninsula, place a shallow cupboard on the living side for placemats and board games so the area shifts easily from breakfast to family time. Open cubbies at the seating end can hold cookbooks or a basket of snacks. Keep the central zone clear for knees and route power neatly to a concealed charging drawer. When storage reflects your habits, the counter stays tidy without effort.
Countertop materials that look good and clean well
Counters handle hot cups, crumbs, and the occasional splash. Choose a surface that wipes clean and resists stains. Engineered quartz is a reliable favorite for mixed use because it is non porous and needs minimal maintenance. Large format porcelain slabs offer excellent stain resistance and allow long spans with few joints. Natural stone brings beauty but needs sealing and a willingness to accept patina. Wood feels warm and is lovely on the seating side as a raised ledge, but it requires care around water. If you want a two tone counter, use a durable surface for the prep zone and a warmer material for the diner facing ledge. Edge details matter. A simple eased edge looks crisp and is comfortable for arms.
Water, heat, and prep zones near the counter
The counter should support cooking without becoming a spill hazard. Place the sink close enough for easy serving and cleanup, yet far enough that splashes do not reach people. A distance of about two to three feet between sink edge and seating line usually works. If the hob is nearby, add a small upstand or a modest height change so hot pans do not slide into the seating zone. Keep a stretch of clear counter between hob and sink for prep and a safe landing. On busy mornings you will appreciate a zone for pouring cereal, toasting, and making coffee without crossing traffic.
Lighting layers that transform mornings and evenings
Light is the secret ingredient that makes a breakfast counter feel inviting. During the day, aim for even ambient light from ceiling fixtures so shadows do not fall on the work surface. In the evening, pendants above the counter add intimacy and define the edge between kitchen and living. Choose warm color temperature to flatter food and faces. Space pendants so light overlaps slightly and avoid glare by choosing shades that direct light down and diffuse gently. Add a concealed strip under the counter overhang or along the toe kick for a soft floating glow. Put all layers on dimmers so mornings feel bright and evenings feel calm.
Seating that supports posture and style
Stools shape how long people linger at the counter. For counter height, stools with footrests at a comfortable level reduce pressure on thighs. Backs allow longer conversations, while backless stools tuck away neatly in small spaces. Upholstered seats feel luxurious but choose easy clean materials for daily use. If the counter serves children, consider adjustable stools or a mix of stool heights so everyone finds a comfortable perch. Match stool finishes to cabinet hardware or lighting to create a quiet thread through the room.
Power, charging, and small appliance planning
Breakfast brings gadgets. Provide pop up outlets or a discreet power strip under the counter for blenders and toasters. A charging drawer with built in USB and outlets keeps phones off the worktop and hides cables. If you enjoy coffee rituals, reserve a corner with plumbing for a built in machine or place a simple pod brewer near the seating end. Route cables through grommets and keep ventilation clear for appliances that run warm. When power is planned early, surfaces remain uncluttered.
Managing noise and smells in an open plan
Open kitchens need gentle ways to control sound and cooking odors. A quiet, efficient chimney or hood above the hob keeps the living area fresh. Choose low sone ratings and run the hood for a few minutes after cooking so smells dissipate. Soft materials around the counter help with acoustics. A rug nearby, upholstered stools, and curtains or sheers in the living room absorb echo so conversations do not bounce. If the counter backs onto the living room, add a small upstand on the kitchen side to hide minor prep mess from view without blocking conversation.
Color and finish strategies that connect spaces
The counter is a visual bridge, so finishes should connect kitchen and living. Use the same tone family for the countertop and the coffee table or TV unit, or repeat a metal finish from lighting in the stool frames. If cabinets are a color, let the counter pick up that tone in a softer or deeper shade. Two tone cabinetry can help too. Keep base units calm and let the counter’s paneling or batten detail provide texture that carries into the living room wall. The goal is continuity so the open plan reads as one composed volume.
Island ideas for larger rooms
If the room allows an island, you gain flexibility. Place seating on the living side so guests watch the cook without entering the work triangle. Integrate a prep sink or a small bar sink at one corner to keep water handy for drinks and salads. Add deep drawers for plates and cutlery so setting the table starts at the island. For a luxury touch, consider a waterfall edge on one side that turns the island into a sculptural piece. Even with an island, maintain generous walkways to circulation paths and doors. The island should feel like a hub, not a roadblock.
Peninsula ideas for compact plans
In tight spaces the peninsula is a star. It gives you three usable faces without demanding circulation on all sides. Place seating on the outer face, storage on the inner, and a clean end panel toward the living area. A rounded corner softens the transition and reduces bumps in narrow rooms. Consider a modest height shift where the seating ledge is slightly higher than the prep area. This hides minor prep mess from the living room and gives a comfortable perch for elbows.
Breakfast ledges for very small rooms
When floor space is limited, a slim ledge can still deliver the breakfast ritual. A counter depth between 12 and 16 inches attached to a wall or window allows two stools in a line. Use foldable or stackable stools that tuck away after use. If the ledge sits in front of a window, choose a durable surface that resists sun and condensation. A narrow drawer under the ledge holds placemats and cutlery. Even this simple solution changes how a compact home feels in the morning.
Backsplashes and vertical surfaces that protect and please
Where the counter meets the kitchen, a practical backsplash keeps cleanup easy. Extend the same material as the countertop for a seamless look or introduce a gentle contrast like a textured tile that reflects light. If the counter faces living space, use a paneling detail on the outer face that is beautiful to look at from the sofa. Fluted panels, ribbed composites, or routed finger pulls add tactile interest. Keep the design calm so it does not compete with the rest of the room.
Zoning the open plan with ceiling and floor cues
Subtle zoning helps the open plan feel composed. A ceiling feature above the counter, such as a shallow tray or a change in paint sheen, can define the area without lowering height. On the floor, a shift in tile pattern or plank direction marks the kitchen zone while a rug anchors the living area. These cues guide movement and give each function a sense of place while keeping the room visually open.
Safety and clearances for families
Counters invite children and pets, so design with safety in mind. Use rounded edges where people pass frequently. Keep hot zones a comfortable distance from seating and specify anti tip brackets for tall stools. If the counter overhangs significantly, add discreet supports or legs that blend into the design so elbows rest confidently. For homes with toddlers, consider stools with low backs and stable bases, and mount child locks on drawers that store sharp tools.
Cleaning routines that keep the counter welcoming
Daily care is easier when materials are chosen wisely. Wipe counters with a mild cleaner suited to the surface after breakfast. Keep a small caddy in a drawer with cloths, a gentle spray, and felt coasters for hot mugs. Once a week, pull stools out and vacuum the toe kick area. If the counter has panel grooves or flutes, dust with a soft brush attachment. These light routines keep the area bright and ready for guests at any moment.
Turning the counter into a social ritual
A counter succeeds when it becomes part of your rhythm. Store bowls, cereal, and spoons in the same drawer so breakfast sets itself. Keep a tray ready for coffee and tea so you can carry everything in one move. Use dimmers to shift from a bright morning to a warm evening. On weekends, the counter can become a baking station or a place for friends to chat while you cook. When the design supports these rituals, the counter is more than furniture. It is a small daily celebration.
A simple step by step plan to design yours
Start by measuring the room and mapping major paths between doors, sink, hob, and fridge. Choose the counter type that fits the plan and confirm clearances for seating and movement. Fix the height and overhang based on your preferred stools. Decide storage priorities and assign drawers and cupboards accordingly. Plan lighting with ambient, pendant, and toe kick layers on dimmers. Route power to a charging drawer and to small appliance spots. Select a durable countertop for prep and a comfortable finish for the seating edge. Build a small mockup from cardboard or tape on the floor to test circulation. Once the layout feels natural, finalize materials and install with attention to edges, joints, and cable management.
The calm reward of an open kitchen with a well designed counter
When the breakfast counter is planned with care, mornings begin without a scramble and evenings wind down with ease. The cook stays part of the conversation. Children finish homework within reach of help. Guests feel welcome to perch with a drink while you plate a meal. Surfaces stay clear because storage works. Light falls softly because layers are thoughtful. The counter holds the room together like a quiet anchor. That is the gift of an open kitchen with a breakfast counter designed for real life. It turns a functional edge into the heart of the home, where food, talk, and comfort meet every single day.